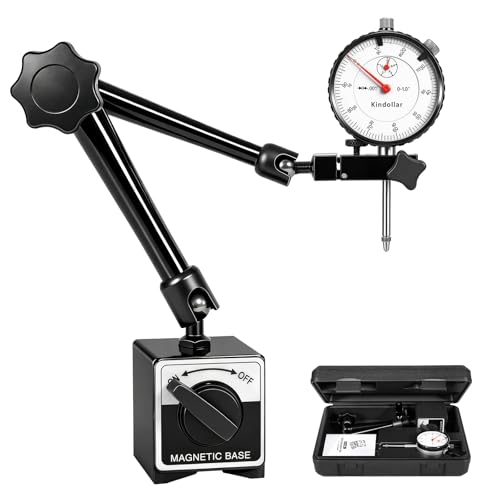
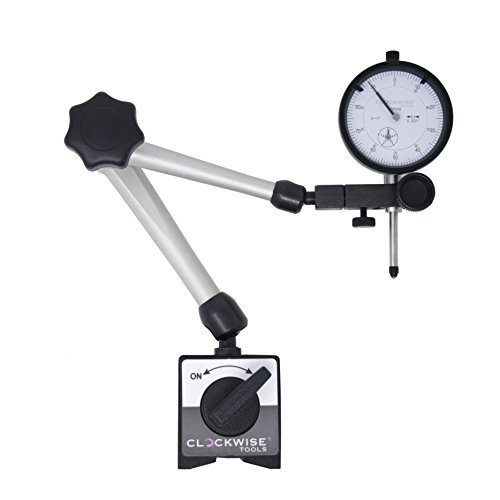
Use a plunger-style dial indicator at $99.84 on a magnetic base for checking travel, depth and flatness. Use a lever-style dial test indicator at $21.99 for indicating a part true in a chuck or checking runout in tight spaces a plunger cannot reach.

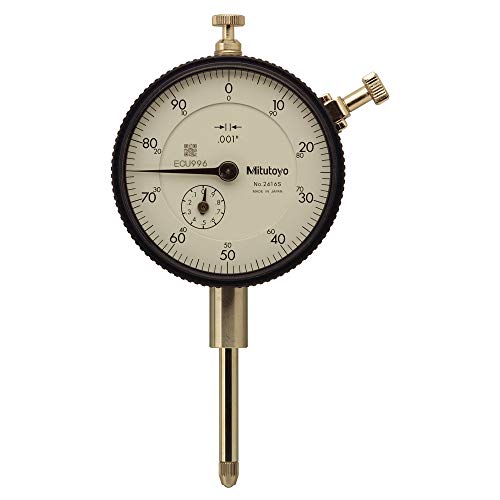
Mitutoyo 2416A Dial Indicator
Check price on AmazonThe two options side by side
Mitutoyo 2416A Dial Indicator
A plunger-style indicator with a 0 to 1 inch range and 0.001 inch graduation. The plunger moves straight in and out, giving a direct reading of linear travel, ideal for tramming a mill head or checking part height.
Check price on Amazon
Neoteck 0-0.03"/0.0005" Dial Test Indicator with Storage Case
A lever-style test indicator with a 0.03 inch range and 0.0005 inch graduation and a swiveling contact arm. Built to reach into tight spots and read runout on a rotating part, the standard tool for indicating a workpiece true.
Check price on AmazonKeep a plunger dial indicator on hand for tramming a mill vise or head, checking flatness, and measuring straight-line travel. Keep a dial test indicator for indicating stock true in a 4-jaw chuck, checking chuck runout, and any spot too tight for a plunger indicator's body to reach. Most machinists own both, since they solve different problems.
What is the mechanical difference between the two?
A plunger-style dial indicator has a spindle that moves in a straight line, in and out, and that linear motion drives the needle around the dial. It measures true linear distance and is the right tool whenever you need to know exactly how far something moved or how tall a step is. A dial test indicator instead uses a small lever arm that pivots against the surface it is touching, and that pivoting motion, not straight-line travel, drives the needle.
That lever arm is also much shorter and the whole body is smaller than a plunger indicator, which is exactly why a dial test indicator can slide into tight recesses, behind a chuck jaw, or against the inside of a bore where a plunger indicator's larger body simply will not fit.
| Factor | Dial indicator (plunger) | Dial test indicator (lever) |
|---|---|---|
| Motion measured | Straight-line plunger travel | Pivoting lever arm contact |
| Typical range | 0 to 1 inch | 0.03 inch |
| Typical resolution | 0.001 inch | 0.0005 inch |
| Fits tight spaces | No, larger body | Yes, compact body and short arm |
When do you actually reach for a dial test indicator over a plunger indicator?
The classic job for a dial test indicator is indicating a part true in a 4-jaw independent chuck, where you rotate the chuck slowly by hand while the lever arm rides against the workpiece and you tap the jaws to zero out the runout shown on the dial. The short lever arm and compact body reach in close to the chuck jaws where a bulky plunger indicator has no room to sit.
The same tool checks spindle runout, verifies a chuck is running true after a jaw swap, and confirms a part is centered before an operation that cannot tolerate being off-axis, like drilling a hole on true center.
When is a plunger dial indicator the better tool?
A plunger indicator is the right call anytime you are measuring genuine linear travel: tramming a milling machine head so the spindle is square to the table, checking how flat a surface is across its length, verifying a quill or ram's travel distance, or confirming a part sits at a specific height in a fixture. The straight-line plunger motion translates directly into a distance reading in a way a lever arm's pivoting motion cannot.
Mount either indicator on a solid magnetic base for repeatable results, and see how to indicate a part in a 4-jaw chuck for the full step by step on the chuck-truing job specifically.
Does resolution matter more than reach for choosing between them?
Not usually. This dial test indicator reads to 0.0005 inch, finer than the 0.001 inch on this plunger indicator, but that resolution gap is not why one gets chosen over the other in practice. The deciding factor is almost always physical access: can the tool's body and arm physically reach the surface you need to check. A dial test indicator with a swiveling arm gets into places a plunger body cannot, which is the real reason it is the standard tool for chuck and spindle work.
Buy based on the job, not the spec sheet resolution number alone.
What should a first-time buyer add to either indicator?
Neither indicator is useful on its own without a solid way to mount it, so budget for a heavy magnetic base at the same time as the indicator itself. A wobbly or underpowered magnetic base introduces more error into a reading than the difference between a 0.001 inch and a 0.0005 inch graduation ever will, since any flex in the mount shows up directly as false movement on the dial.
A fine adjustment arm on the magnetic base also helps considerably, letting you sneak the contact point into position without wrestling the whole base into place, especially useful when indicating in a tight spot near a chuck or a mill vise jaw.
Shop the tools for this
An even spread across the price range, cheapest to premium.



Frequently asked questions
Do I need both a dial indicator and a dial test indicator?
Most machinists eventually own both because they solve different problems. A plunger dial indicator handles tramming, flatness checks and travel measurement, while a dial test indicator handles indicating a part true in a chuck and reaching tight spots the plunger cannot. Starting with a test indicator is common since chuck-truing is an early, frequent task on a mini lathe.
Can a dial test indicator measure the same things as a plunger indicator?
It can approximate some tasks, since both display a runout or deviation on a dial, but a lever arm introduces a small cosine error as the arm angle changes, making it less accurate for pure linear travel than a plunger indicator. Use a plunger indicator whenever you need a genuinely accurate straight-line distance rather than a comparative runout check.
How do I mount a dial indicator or dial test indicator securely?
A magnetic base on the machine's table or bed is the standard mount for both types, giving a rigid, repeatable platform that will not shift mid-check. Make sure the base surface is clean of chips and oil before switching the magnet on, since even a thin film of swarf under the base introduces play that shows up as false movement on the dial.
What does 0.0005 inch graduation actually mean in practice?
It means each small tick mark on the dial represents five ten-thousandths of an inch of movement, finer than the 0.001 inch marks common on many plunger indicators. In practice this finer graduation helps most when indicating a precision fit true, where getting runout down to a couple tenths of a thousandth genuinely changes how a part seats.
Why does my dial test indicator read differently depending on the angle I hold it?
That is cosine error, a real characteristic of lever-style indicators where the reading understates true movement any time the contact arm is not perpendicular to the direction of travel. Keep the arm as close to perpendicular to the surface as the setup allows, and be consistent about the angle between checks so any error stays comparable measurement to measurement.
Keep going
More comparisons
- 7x14 vs 8x16 mini lathe
- Carbide vs HSS lathe tools
- Digital vs dial caliper
- Caliper vs micrometer
- ER32 vs 5C collets
- Portable bandsaw vs 4x6 horizontal bandsaw
- Spiral point vs hand taps
- Cobalt vs titanium drill bits
Researched from published specifications, standards and verified owner reviews. Not professional advice. How we research.